Friday, October 14, 2011

Elemental Paper with a Twist!
Adorable Owl Wall Hanging and Mobile

Canvas Wall Hanging
Create this paper-pieced owl—isn’t he a cutie?—then attach it to a 12" x 12" canvas (available at your local craft store). Here are some tips:

Paper Mobile
Crafting this lightweight mobile is a cinch when you use two packages of Dimensional Element On Target (Z1226) chipboard circles, a 1 1/4" circle punch (Z1311), and the My Acrylix® Hot Diggity (C1407) stamp set.
Home décor just took on a whole new level of cuteness! These quick and easy owl-themed projects are a great way to bring a smile to the faces of all who see them.
Canvas Wall Hanging
Create this paper-pieced owl—isn’t he a cutie?—then attach it to a 12" x 12" canvas (available at your local craft store). Here are some tips:
- Cut the pieces freehand or print some clip art from the Internet for a pattern. We used the flower stamp from My Acrylix® Fill in the Blank (D1465) as a template for the feet, and used the
1 1/4" circle punch (Z1311) to punch the eyes from Cocoa cardstock. - We wanted to add Juniper to the artwork, so we added the Typeset Juniper damask B&T Duos® paper to the Sorbet, Crème Brulee, and Olive B&T papers from Elemental.
- For the background, score a piece of 12” x 12” cardstock at
1 1/4" intervals. Turn the paper over and lightly sand the ridges using a sanding block.- If the Sorbet background doesn’t match your particular color scheme, substitute Olive, Juniper, Desert Sand, Crème Brulee, or Cocoa cardstock for it.
- Attach the eyes, beak, wings, and belly to the body, using 3-D foam tape on the wings and beak. Be sure to outline the entire wings and beak with foam tape and add some in the middle to make sure it’s sturdy.
- Attach the finished owl body to the cardstock base then attach the whole thing to the canvas using Liquid Glass or Mod Podge.
Paper Mobile
Crafting this lightweight mobile is a cinch when you use two packages of Dimensional Element On Target (Z1226) chipboard circles, a 1 1/4" circle punch (Z1311), and the My Acrylix® Hot Diggity (C1407) stamp set.
- Stamp owl five times each in Crème Brulee, Sorbet, and Juniper on Colonial White cardstock; trim. Turn cut-out image over and stamp on the blank side.
- Punch 10 pairs of circles each from Elemental (Crème Brulee and Sorbet) and Typeset (Juniper) B&T Duos papers. Attach pairs of matching circles together to hide back of B&T.
- Leaving space between each element, use a sewing machine to stitch through centers of circles or owls. Be sure to leave extra thread at the top.
- Take the largest scallop circle from each Dimensional Elements package and sponge surface with Sorbet ink. Sponge edges with Cocoa ink, if desired.
- Create the top of the mobile as follows:
- Flip one of the scallop circles upside down so the sponged surface is facing away from you.
- Tie bow in ribbon and secure ends with Liquid Glass to the white side of the Dimensional Element scallop circle. We used the dotted ribbon from the Designer Ribbon Colonial White collection (Z1126).
- Use piercing tool to punch nine evenly spaced holes on the same white side of the Dimensional Elements scallop circle. Pull thread through each hole, starting under the circle on the sponged side; knot to secure.
- Use Liquid Glass to attach second Dimensional Elements circle to first, placing white sides together and sandwiching thread ends and ribbon.
- Alternate idea: If you’d like to use more of your Dimensional Elements circles, simply incorporate them in the mobile by switching out some of the punched circles or stamped owls. All you’ll do is match up sizes from each package, sponge or cover them with B&T paper, attach thread to center of one on white side, and then attach the white sides together. Simple!
Tuesday, October 4, 2011
Buttoned Up Card Set!
Lovely, chunky, fashion-forward bling turns your cards from charming to super-fantabulous. Learn the WOW techniques in this how-to video from Close To My Heart, and then send holiday cards that people will be talking about into the New Year!
Sunday, October 2, 2011
FAB FREEBIE IN OCTOBER - $400 in great CTMH products for just $99!

New Consultants who enroll for $99 (US&CAN) with Close To My Heart between October 1–31, 2011, will receive one FREE* New Consultant Kit add-on collection! Each of our three add-on collections is priced at $40 (US&CAN) and has a retail value of $80 US /$85 CAN–$130 US/$140 CAN, so this is an incredible deal!
*Shipping/handling is free on add-on collections. US tax will be charged on the retail price of $40.
SIGN UP TODAY ON MY WEBSITE HERE!
FIRST - CHOOSE YOUR KIT
TYPESET:

OR SONOMA:

THEN, CHOOSE YOUR FABULOUS FREEBIE!

Friday, September 30, 2011
Dreamin'
I created these layouts at my weekend crop, this past weekend....using the Dreamin' kit. I made 4 - 2 page layouts and a bunch of cards. It felt pretty darn good to end up with only a few pieces of scraps left over, from the kit.
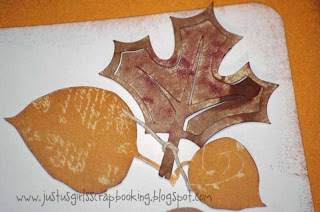
 I used the 'Art Philosophy' Cricut Cartridge to create the Maple leaves. The circles pattern is the zip strip from one of the B&T papers...too cute! The 2008 is stamped using the 'Bohemian Alphabet' (E1019).



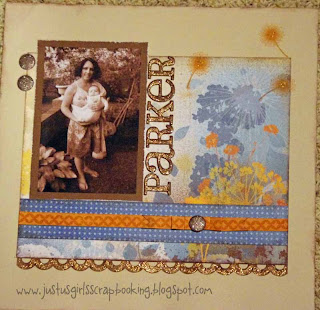 This is the featured Dreamin' Workshop-On-The-Go layout. It comes with the Shimmer brads and the new Bronze Glitz Glitter Gel....which I love, love, LOVE!
The semi-circle patter on the lower half of both pages, was supposed to be made with a stamp (included in the WOG kit) but I used the Kraft Color Ready Borders....now on CLEARANCE!


 All the leaf and flower embellishments on the cards were made using the 'Art Philosophy' Cricut Cartridge.


 I used some of my left over "Felicity Collection" kit for this layout and the card. The buttons are the Canvas Badge Buttons (Z1397). And one of the Filigree Charms (Z1269). The 'Thank You' title on the card was cut/stamped using the 'Art Philosophy' Cricut Cartridge collection.


The semi-circle patter on the lower half of both pages, was supposed to be made with a stamp (included in the WOG kit) but I used the Kraft Color Ready Borders....now on CLEARANCE!


A big thanks to Susan Williams, a fellow CTMH consultant, who designed this Dreamin' workshop.


Monday, September 19, 2011
Photo Printing Tutorial
AT LONG LAST....
Here is a video tutorial on how to place two small photos on one piece of photo printing paper. They can be printed using your own photo printer or sent to a commercial printer.
Perfect for those layouts where you want to have some smaller photos, but you don't want to...or you don't have the photos to manually crop down to 2x2's.
Check out this example of the 'Hocus Pocus' layout example from the CTMH's Magic book and the 'Lucky' paperline.

Thanks....and keep checking back for more PSE tutorials!
Sherri
Here is a video tutorial on how to place two small photos on one piece of photo printing paper. They can be printed using your own photo printer or sent to a commercial printer.
Perfect for those layouts where you want to have some smaller photos, but you don't want to...or you don't have the photos to manually crop down to 2x2's.
Check out this example of the 'Hocus Pocus' layout example from the CTMH's Magic book and the 'Lucky' paperline.

Thanks....and keep checking back for more PSE tutorials!
Sherri
Tuesday, September 13, 2011
Love Your Layout - September!
Here is the next video tutorial in the popular Studio J series...Love Your Layout! In this video, they'll show you how you can make a dynamic two-page layout in just 30 mins or less...ENJOY!
Subscribe to:
Posts (Atom)